As a companion to the White(ish) Layer Cake, I was looking for a recipe that didn’t require food coloring or strawberry puree and came across this one at Your Cup of Cake. This was the perfect addition to fill and cover the White(ish) Layer Cake. Recipe as follows:
INGREDIENTS:
1 pkg (1.2 oz) of freeze-dried strawberries (I got mine from Trader Joe’s)
1 C unsalted butter, softened
3 t lemon juice, or milk
1 1/2 t vanilla extract
3 C powdered sugar, 1 C more if needed
DIRECTIONS:
Dump your freeze dried strawberries into a food processor. Be sure and take out the little white packet inside, this packet keeps out any moisture but it’s not edible. Finely crush the berries in your food processor or blender.
Trader Joe’s Dehydrated Strawberries
Pour into a sifter to remove any larger chunks, and discard what doesn’t go through the sifter.
Butter and Sifted Strawberries
In a stand mixer, beat sifted strawberries and butter until smooth.
Add lemon juice and vanilla extract and beat again.
Slowly add in powdered sugar until you reach your desired consistency. Cupcakes will need a stiffer frosting while a cake can be a little more soft. To check, I always pull out my spatula and swipe my finger through the frosting. If the frosting keeps it’s shape and doesn’t sink, you’re good to go!
I wanted to call this “Natural Strawberry Frosting”, but mother nature doesn’t freeze-dry strawberries. It’s probably the most natural you’ll get for really colorful frosting!
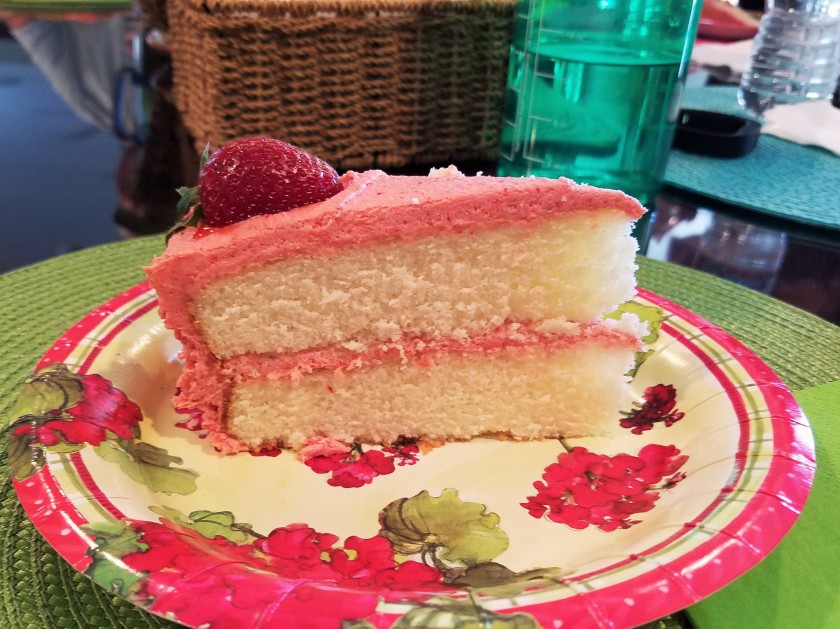
To avoid writing on the cake and possibly ruining it with my not-so-great frosting script, I topped the cake with some fresh strawberries that Kevin picked up from the farmer’s market. However, they were so juicy that they “leaked” a bit on the drive over to the potluck! Here’s a photo of the finished cake:
Strawberry Frosting – Without Dyes or Artificial Flavors
This frosting will definitely be a go-to for me. It wasn’t too sweet thanks to the lemon juice. You can always add more lemon juice to make it more tart too!
For Mother’s Day with Kevin’s side of the family, I wanted to make a white cake with strawberry frosting. However, I ended up turning this into a white(ish) cake because I couldn’t bring myself to only use the egg whites that the recipe called for and waste 6 egg yolks! After a teeny adjustment, here is the recipe as adapted by Cook’s Illustrated:
INGREDIENTS:
2 1/4 C cake flour (9 ounces), plus more for dusting the pans
1 Cwhole milk, at room temperature
3 large eggs** (3/4 C), at room temperature
2 t almond extract
1 t vanilla extract
1 3/4 C granulated sugar (12 1/4 ounces)
4 t baking powder
1 t table salt
12 T unsalted butter (1 1/2 sticks), softened but still cool
**Use 6 large egg whites (3/4 C) at room temp if you want a true WHITE cake. The yolks are what gave this cake the light yellow hue.
DIRECTIONS:
Set oven rack in middle position. (If oven is too small to cook both layers on a single rack, set racks in upper-middle and lower-middle positions.) Heat oven to 350 degrees. Spray two 9-inch round cake pans with nonstick cooking spray; line the bottoms with parchment or waxed paper rounds. Spray the paper rounds, dust the pans with flour, and invert pans and rap sharply to remove excess flour.
Mix cake flour, sugar, baking powder, and salt in bowl of electric mixer at slow speed. Add butter; continue beating at slow speed until mixture resembles moist crumbs, with no powdery streaks remaining.
Moist Crumbs!
Pour milk, egg whites, and extracts into 2-cup glass measure, and mix with fork until blended. Add all but 1/2 cup of milk mixture to crumbs and beat at medium speed (or high speed if using handheld mixer) for 1 1/2 minutes. Add remaining 1/2 cup of milk mixture and beat 30 seconds more. Stop mixer and scrape sides of bowl. Return mixer to medium (or high) speed and beat 20 seconds longer.
Don’t Over Beat
Divide batter evenly between two prepared cake pans; using rubber spatula, spread batter to pan walls and smooth tops. Arrange pans at least 3 inches from the oven walls and 3 inches apart. (If oven is small, place pans on separate racks in staggered fashion to allow for air circulation.)
Bake until thin skewer or toothpick inserted in the center comes out clean, 23 to 25 minutes. Let cakes rest in pans for 3 minutes. Loosen from sides of pans with a knife, if necessary, and invert onto wire racks. Reinvert onto additional wire racks. Let cool completely, about 1 1/2 hours before frosting.
White(ish) Layer Cake
The strawberry frosting recipe will be coming soon, but here’s a peek at the finished product!
I’m still terribly backlogged on posts, but thought I’d throw a more recent baking project into the mix. I’m going to be 30 this year and have really noticed my body’s growing inability to process sugar and junk food in the last year. I’ve been forced to be more selective about what I consume now, both in quantity and quality. Maybe eating seven tacos at our annual Cinco de Mayo lunch at work isn’t the best approach to a healthy life, or finishing Kevin’s food and along with the extra food we were hoping to use as leftovers for lunch the next day won’t help my cause either even if it’s healthy food. My skinny jeans just aren’t as easy to put on or get off anymore, though I suppose they never were thanks to these God-given giant calves of mine. But there are certain homemade-type sweets – ice cream, ice cream sandwiches, anything with a good pie crust, or a good cake – just get me every time. One of those things is this chocolate cupcake recipe.
My contribution to Kevin‘s family’s Mother’s Day celebration was a chocolate cupcake with espresso buttercream frosting. The chocolate cupcake recipe is a reliable recipe that I first fell in love with when making my Irish Car Bomb Cupcakes for St. Patty’s a couple of years ago, and it’s still my favorite. There is something about the Guinness and sour cream in it that just adds an extra special chocolatey decadence without making the cake feel overly rich and heavy. Here is the recipe for this fantastic duo, as adapted from two different Brown Eyed Baker recipes (cupcake and frosting).
CUPCAKE INGREDIENTS:
1 C Guinness stout
1 C unsalted butter, at room temperature
¾ C Dutch-process cocoa powder (MUST be dutch-process!!!)
2 C all-purpose flour
2 C granulated sugar
1½ tsp baking soda (use fresh baking soda less than 6 months old to get a good rise from your cupcakes)
¾ tsp salt
2 eggs
2/3 C sour cream
CUPCAKE DIRECTIONS:
Preheat oven to 350 degrees F. Line 24 cupcake cups with liners. Bring the Guinness and butter to a simmer in a heavy, medium saucepan over medium heat. Add the cocoa powder and whisk until the mixture is smooth. Set aside to cool. Original recipe says cool slightly, but definitely cool it down til you can touch the pot with your bare hand.
Sift together the flour, sugar, baking soda and salt in a large bowl to combine. Using an electric mixer, beat the eggs and sour cream on medium speed until combined.
Always Sift Your Dry Ingredients Together
Add the Guinness-chocolate mixture to the egg mixture and beat just to combine. Reduce the speed to low, add the flour mixture and beat briefly. Don’t overmix!!! Using a rubber spatula, fold the batter until completely combined. Divide the batter among the cupcake liners.
Bake until a toothpick inserted into the center comes out clean, about 16-17 minutes. Cool the cupcakes on a rack.
FROSTING INGREDIENTS:
1 C (2 sticks) unsalted butter, at room temperature
2½ C powdered sugar
1½ tsp vanilla extract
1½ tsp espresso powder (use more if you want a stronger coffee flavor)
FROSTING DIRECTIONS:
Mix the espresso powder into the vanilla until dissolved; set aside.
Using the whisk attachment of a stand mixer, whip the butter on medium-high speed for 5 minutes, stopping once to scrape the sides of the bowl. Reduce the mixer speed to low and add the powdered sugar a little at a time, waiting until it is mostly incorporated before adding more. Once all of the powdered sugar has been added, scrape the sides of the bowl and increase the speed to medium-high and whip until fluffy, about a minute or two.
Add the espresso and vanilla mixture and continue to mix at medium-high until it is completely incorporated, scraping the sides as necessary.
Espresso Swirl – Mix All the Way In
It’s been a while since I’ve actually baked anything, so it was nice to get back into it. The frosting is a lighter buttercream and I think could be somewhat volatile in hot weather, hence some aggressive driving getting to the valley on a HOT Sunday afternoon.
Time to Frost
It’s definitely not the thick Sprinkles style frosting. Just add more powdered sugar or subtract a little of the butter if you do like it that way.
Chocolate Cupcakes with Espresso Buttercream Frosting
I was definitely keeping tabs on Kevin’s family members to see if they were into the combo since Kevin told me last minute that no one really drinks coffee in his family, but it went over well and a couple people went back for seconds. RELIEVED.
Always Sift Your Dry Ingredients Together
Creamed Butter and Powdered Sugar
Espresso Powder and Vanilla
Espresso Swirl – Mix All the Way In
Time to Frost
Chocolate Cupcakes with Espresso Buttercream Frosting


